Dark spots at intersections? Pick Type II/III/IV/V to cut complaints.
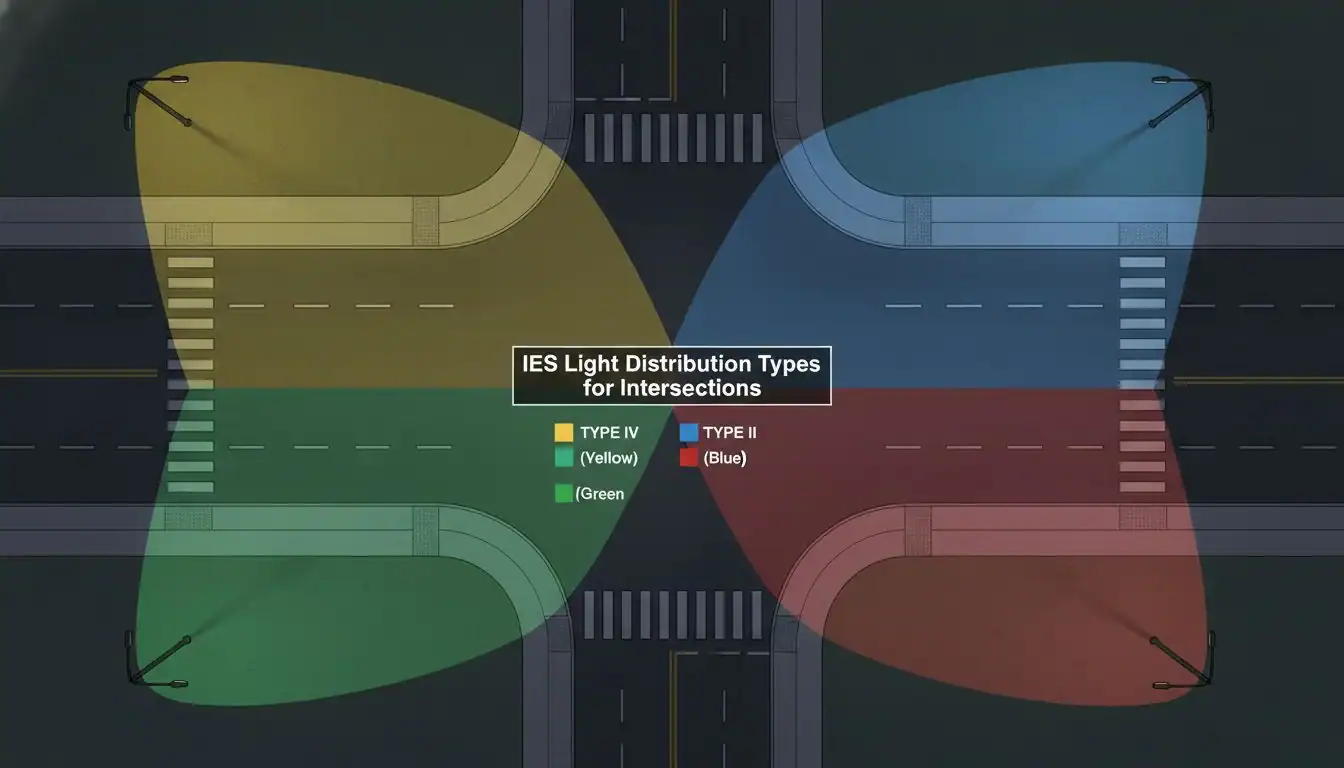
Dark spots at intersections create danger and trigger complaints. This undermines your project's safety goals and can lead to costly rework. The solution is choosing the right IES distribution type1.
To eliminate dark spots at a four-way intersection, use a Type V distribution2 for a single, central pole. If using corner poles, combine Type III for the wider main road and Type II for narrower side streets to ensure complete and uniform coverage.

Choosing the right lighting feels complicated, but it doesn't have to be. I've spent over 13 years helping contractors and developers get this right the first time. It comes down to understanding a few simple principles about how light is distributed. Once you know the basic IES types, you can solve most common intersection lighting problems, improve safety, and keep residents happy. Let's break down how you can do this for your next project.
Proper roadway lighting can reduce nighttime pedestrian injury crashes at intersections by up to 42%.True
This statistic is supported by studies from the Federal Highway Administration (FHWA), highlighting the critical role of lighting in pedestrian safety.
Using a Type V light is always the most energy-efficient solution for intersections.False
While a single Type V can be efficient, four lower-wattage Type III fixtures at the corners might consume less total energy for a large or irregularly shaped intersection. Efficiency depends on the specific application.
Which IES type reduces dark spots at a four-way intersection?
Struggling with uneven light and dangerous shadows at your intersections? The wrong fixture choice is often the problem. I'll show you how to select the right IES type for safety.
For a standard four-way intersection, a Type V optic on a central pole provides 360-degree coverage. For corner-mounted poles, use Type III for wider approaches and Type II for narrower ones to eliminate gaps.
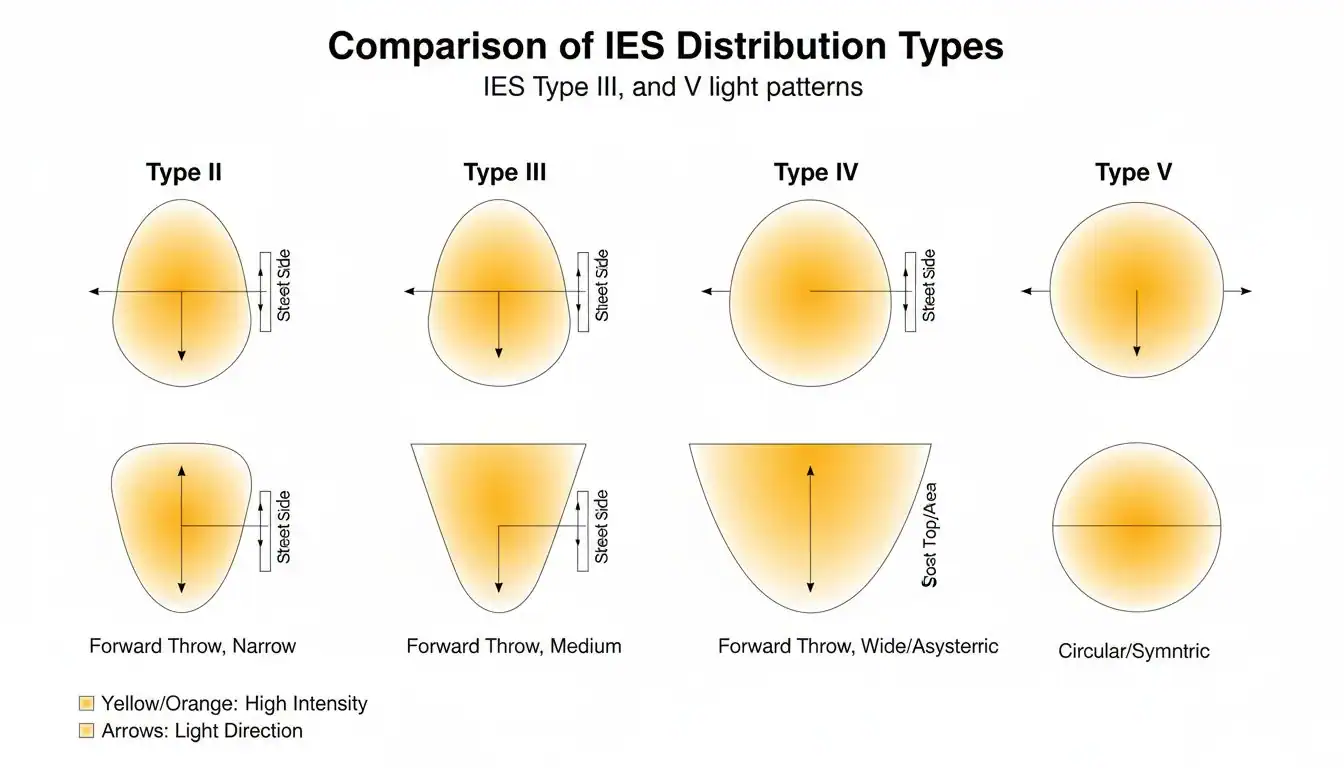
Choosing the right IES distribution type is the most important step to prevent dark spots3. Each type is designed for a specific geometry. Think of it like choosing the right sprinkler head for your lawn; you wouldn't use a narrow strip sprinkler for a wide-open area. I recently worked with a developer in Thailand on a new commercial complex. They initially planned to use the same Type III fixtures everywhere, but their four-way intersection had a wide main road and two narrow access roads. This plan would have left dark, unsafe gaps. We switched the narrow roads to Type II fixtures, which have a tighter beam. This small change ensured seamless coverage without wasting light or energy.
Understanding the Main IES Types
Here’s a quick guide to help you match the IES type to the road shape.
| IES Type | Best Use Case | Light Pattern Shape |
|---|---|---|
| Type II | Narrow roads, side streets, pathways | A long, narrow oval |
| Type III | Wider roads, perimeter lighting | A wider oval, pushes light forward and outward |
| Type IV | Perimeter of parking lots, medians | A strong forward-throw, "horseshoe" shape |
| Type V | Center of intersections, roundabouts, large lots | Symmetrical circle (360-degree coverage) |
IES Type I is the most common type used for roadway intersections.False
Type I is designed for the center of very narrow pathways, like sidewalks or bike paths, and is rarely suitable for vehicle intersections. Types II, III, and V are far more common.
A Type III distribution throws light wider than a Type II distribution.True
By definition, a Type III pattern is designed for roadways where the width is up to 2.75 times the mounting height, while Type II is for narrower roads up to 1.75 times the mounting height.
How do I size mounting height and spacing quickly?
Confused by complex photometric plans for pole height and spacing? Guesswork leads to poor results and wasted money. Here are simple rules of thumb to get you started quickly.
Use the roadway width to estimate mounting height4. For Type II, the road width should be about 1.75 times the mounting height or less. For Type III, the width can be up to 2.75 times the height.
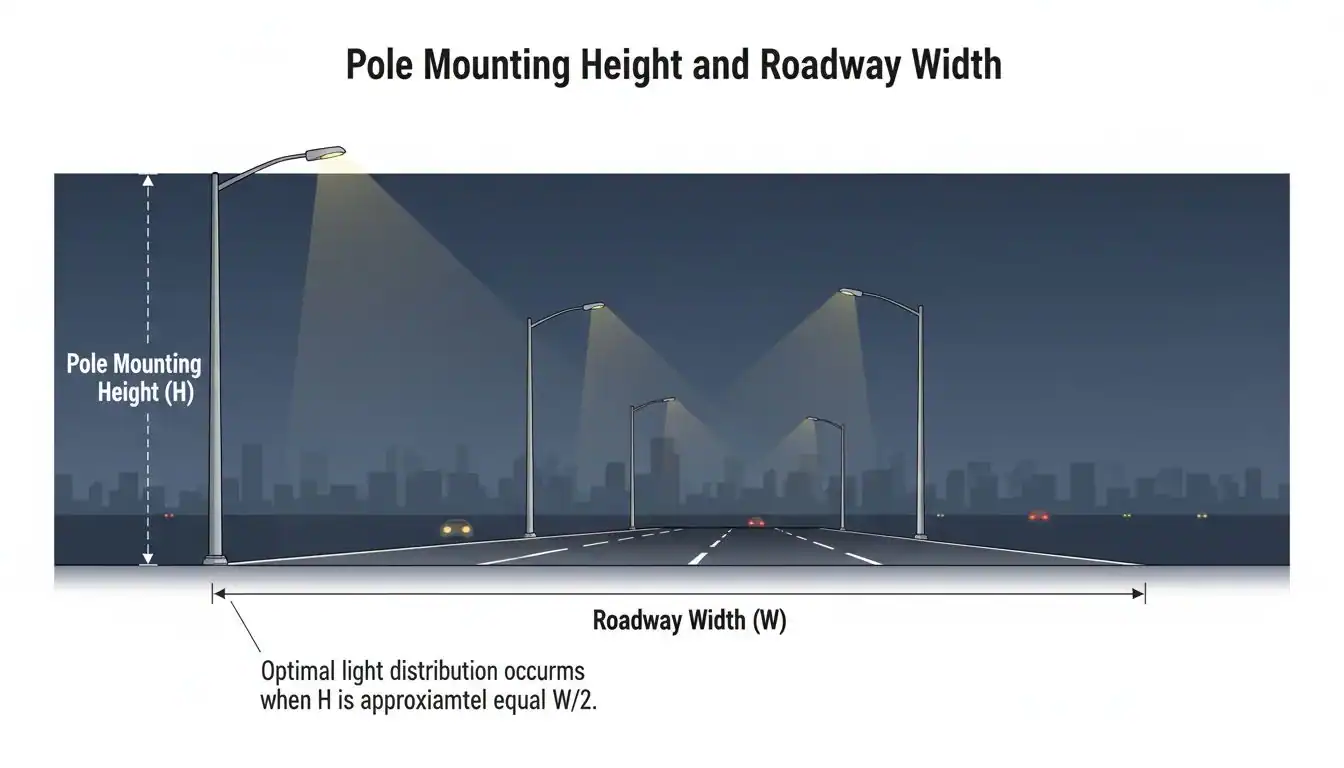
You don't need to be a lighting engineer to make a good initial estimate. These simple ratios are my go-to for preliminary planning. They help me quickly determine if a client's existing plan is viable or if we need to adjust pole locations or fixture types. For example, if you have a 40-foot wide road and want to use Type III fixtures, you can work backward. 40 feet divided by 2.75 is about 14.5 feet. This tells you that a mounting height of 15 feet or more is a good starting point. This quick math saves a lot of time before running a full photometric simulation, which our team at Besenled always does for final specifications to guarantee performance.
Quick Sizing Rules
These rules of thumb connect the IES type to the geometry of your site. They are the foundation for good lighting design5 before you get into detailed calculations.
| IES Type | Roadway Width to Mounting Height (MH) Ratio | Example (30 ft / 9m MH) |
|---|---|---|
| Type II | Width ≤ 1.75 × MH | Good for roads up to 52.5 ft / 16m wide |
| Type III | Width ≤ 2.75 × MH | Good for roads up to 82.5 ft / 25m wide |
| Type IV | Width ≤ 3.75 × MH | Good for roads up to 112.5 ft / 34m wide |
| Type V | N/A (used for open areas) | Spacing depends on uniformity goals |
Remember, spacing between poles is just as important. You need to ensure the light patterns from adjacent poles overlap enough to create smooth, even light.
Doubling the mounting height of a light pole will double the area it illuminates.False
Light intensity decreases with the square of the distance. Doubling the height actually quadruples the coverage area, but the light level (foot-candles or lux) on the ground will be significantly lower, requiring a much more powerful fixture.
The ratio of roadway width to mounting height is a key factor in selecting an IES distribution type.True
This ratio is the basis for the IES definitions of different distribution types and is a fundamental rule of thumb in roadway lighting design.
Where does lighting deliver the biggest safety benefit at intersections?
Want to maximize the safety impact of your lighting budget? Placing lights randomly is inefficient. Focus on the most critical areas to prevent accidents and protect people.
Lighting delivers the biggest safety benefit at conflict points. These are areas where vehicle and pedestrian paths cross, such as crosswalks, turning lanes, and the center of the intersection. Proper illumination here is critical.
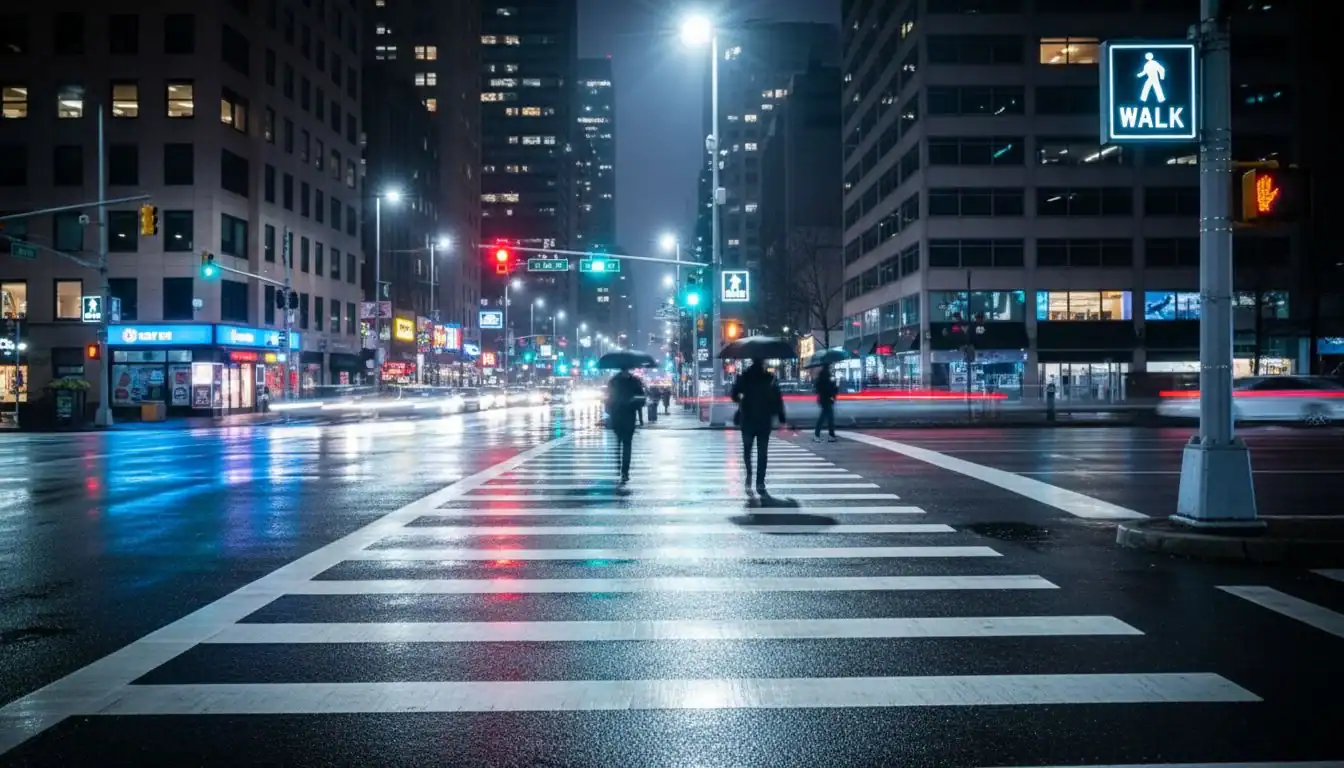
The data is clear. Good lighting dramatically reduces nighttime crashes—by up to 38% at urban and rural intersections. For pedestrians, the effect is even greater, with a potential 42% reduction in injury crashes. The key is to focus light where it matters most. I always tell my clients, "Light the conflict, not just the road." This means ensuring crosswalks are bright and visible from a distance. It also means making sure a driver turning left can see an oncoming car clearly. By concentrating high-quality, uniform light in these zones, you are making a direct and measurable impact on public safety. It’s the most effective way to use your lighting budget.
Key Safety Hotspots
To maximize safety, ensure your lighting plan prioritizes these three areas within an intersection.
- Crosswalks: Pedestrians are most vulnerable here. Light should be bright and uniform across the entire crossing, with good vertical illumination so drivers can see the person, not just their feet.
- Center of the Intersection: This is where turning and crossing vehicle paths overlap. Eliminating dark spots here helps drivers judge speeds and distances accurately, preventing T-bone and head-on collisions.
- Approach and Decision Zones: The areas leading into the intersection where drivers need to see signs, signals, and other vehicles to make safe decisions.
Adding lighting to a previously unlit rural intersection can reduce nighttime crashes by over 60%.True
Studies by the FHWA have shown crash reductions of 60% or more in some cases, demonstrating the profound safety impact of basic lighting in dark, rural environments.
Brighter is always safer when it comes to intersection lighting.False
Excessive brightness can cause disabling glare for drivers, which actually reduces visibility and safety. The goal is uniform, well-controlled light, not just raw brightness.
Residents complain about glare and light trespass—what should I specify?
Are complaints about glare and light spilling into windows derailing your projects? This common issue is frustrating but easily avoided with the right specifications from the start.
To cut complaints, specify luminaires with full cutoff optics (a low 'U' value in their BUG rating6). Also, use appropriate shields and select the correct IES type to direct light only where needed—onto the road and away from homes.
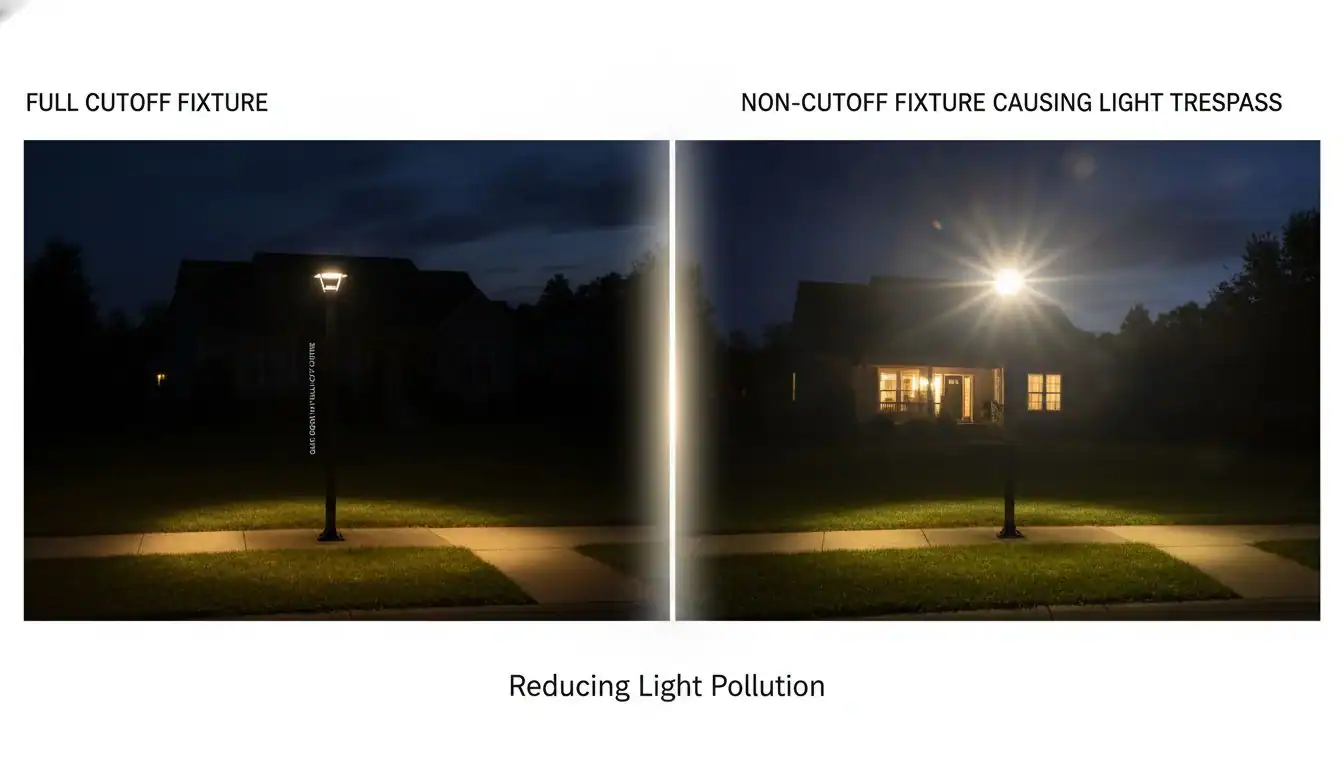
I hear this from contractors all the time. A project is almost complete, and suddenly complaints start rolling in from the neighbors. The fix is almost always proactive, not reactive. It starts with the fixture specification. You need to look for the BUG rating, which stands for Backlight, Uplight, and Glare. For any project near residential areas, you want U0, meaning zero uplight is projected into the night sky or second-story windows. You also want low backlight and glare ratings. Combining a U0-rated fixture with the right IES distribution type, like a Type II or III that keeps light on the street, is the best way to be a good neighbor. It prevents headaches and ensures your project is seen as a community improvement.
Understanding BUG Ratings
The BUG rating system is your best tool for preventing light pollution.
- B (Backlight): Light spilling behind the pole. A low 'B' rating is crucial when poles are near properties.
- U (Uplight): Light directed above the fixture. This causes sky glow and light trespass into windows. Always aim for a U0 rating.
- G (Glare): High-angle forward light that can be blinding to drivers and pedestrians. A lower 'G' rating is safer and more comfortable.
By specifying fixtures with low B, U, and G ratings, you ensure light goes only where it's intended. This is a core part of our philosophy at Besenled—providing effective, efficient, and community-friendly lighting solutions.
A BUG rating of B5 U5 G5 is ideal for environmentally sensitive areas.False
This is the worst possible BUG rating, indicating maximum backlight, uplight, and glare. For sensitive areas, a rating like B1 U0 G1 would be far more appropriate.
Full cutoff fixtures direct nearly all of their light downward, below the horizontal plane of the luminaire.True
This is the definition of a full cutoff design. It is the single most effective feature for reducing sky glow and light trespass.
Is a standard required?
Wondering if you can just "wing it" with intersection lighting? Skipping industry standards can lead to poor performance, liability issues, and unsafe conditions for the public.
Yes, following a standard is highly recommended. The ANSI/IES RP-8-217 is the key document for roadway lighting. It provides all the design criteria for intersections, crosswalks, uniformity, and glare control.
While the rules of thumb I've shared are great for quick estimates, a formal standard is your guide for final, official designs. In North America, that's the ANSI/IES RP-8. I always reference it when finalizing photometric calculations for my clients. Why? Because it's the industry's consensus on what constitutes safe and effective lighting. It gives you defensible, evidence-based targets for things like light levels (illuminance), evenness (uniformity), and glare. Adhering to a standard like RP-8 isn't just about checking a box; it's about professional due diligence. It protects you from liability and ensures your project delivers the safety and quality you promised. It’s the blueprint for getting it right.
What's Inside IES RP-8?
This standard provides the technical foundation for your design. Here are the key elements it covers:
- Illuminance Levels: Specifies the required amount of light (measured in foot-candles or lux) based on the road classification and pedestrian traffic.
- Uniformity Ratios: Defines how evenly the light must be spread. The average-to-minimum and maximum-to-minimum ratios are critical for preventing dark spots and ensuring good visibility.
- Veiling Luminance (Glare): Sets limits on the amount of disabling glare drivers experience, which is crucial for safety at complex intersections.
- crosswalk lighting8: Provides specific recommendations for illuminating crosswalks to ensure pedestrian visibility.
Following these guidelines ensures your design is not only effective but also compliant with industry best practices.
The IES RP-8 standard is a legal requirement for all roadway projects in the United States.False
While not a federal law, RP-8 is the accepted industry standard of care. Many state and local transportation departments adopt it or reference it in their own legal requirements, making it a de facto requirement for most public projects.
A good uniformity ratio (e.g., 3:1 average-to-minimum) is more important for visibility than high peak brightness.True
The human eye adapts to the average light level. Pockets of darkness within a brightly lit area are difficult to see into, making uniformity critical for identifying hazards. A smooth, even field of light is safer than one with bright and dark spots.
Answering Your Top Questions (FAQ)?
Still have questions about intersection lighting? You're not alone. Let's quickly tackle the most common questions I get from contractors, developers, and project managers every day.
From Type III vs. V to preventing crosswalk dark spots and cutting glare, getting clear answers helps you specify with confidence and avoid the most common and costly pitfalls.
Over the years, I've found that the same questions come up again and again. These are the practical, on-the-ground issues that determine a project's success. Whether you're a procurement director like Somchai in Thailand planning a new retail center or a contractor in North America upgrading city infrastructure, these details matter. At Besenled, our goal is to be more than just a supplier; we're a project partner. That means providing clear, actionable answers. Here are my quick takes on the questions I'm asked most often.
“Type III vs Type V—what’s better for intersections?”
It depends entirely on pole placement. Type V is for a single pole in the center of the intersection, providing a 360-degree circular pattern. Type III is for poles located at the corners or sides of the road, casting a wide oval of light forward and out. Don't choose one over the other without knowing your pole layout first.
“How do I prevent dark spots at crosswalks?”
The best method is to ensure your main lighting layout provides sufficient overlap at the crosswalk. If that's not possible, add dedicated, lower-wattage luminaires specifically aimed at the crosswalk. This ensures excellent vertical illumination, making pedestrians clearly visible to approaching drivers.
“What mounting height works for narrow side streets?”
For narrow streets, you can use lower mounting heights, often around 20-25 feet (6-7.5 meters). Pair this with a Type II distribution, which has a narrower pattern perfect for these applications. Just follow the rule of thumb: roadway width should be no more than 1.75 times the mounting height.
“Does lighting really reduce nighttime crashes?”
Absolutely. The evidence is overwhelming. As I mentioned earlier, studies consistently show that adding or upgrading lighting can reduce nighttime crashes at intersections by 33–38% and nighttime pedestrian injury crashes by as much as 42%. It is one of the most effective safety countermeasures available.
“How do I cut complaints about glare?”
There are three keys: 1) Specify full cutoff fixtures with a U0 BUG rating to prevent light trespass. 2) Use the correct IES distribution type to keep light focused on the road. 3) Avoid overpowering fixtures; use just enough light to meet standards, as excessive brightness is a primary cause of glare.
Conclusion
Choosing the right IES type and following simple rules for height and placement eliminates dark spots, enhances safety, and keeps both drivers and residents happy. Plan smart from the start.
References
-
Understanding IES distribution types is crucial for effective intersection lighting design, ensuring safety and visibility. ↩
-
Type V distribution provides 360-degree coverage, making it ideal for central poles at intersections. ↩
-
Eliminating dark spots is essential for safety; learn effective strategies to achieve uniform lighting. ↩
-
Correct mounting height is vital for effective light distribution; learn how to determine the best height. ↩
-
Effective lighting design enhances safety and reduces accidents; explore best practices for optimal results. ↩
-
Understanding BUG ratings helps prevent light pollution and ensures community-friendly lighting solutions. ↩
-
The ANSI/IES RP-8-21 standard provides essential guidelines for safe and effective roadway lighting design. ↩
-
Proper crosswalk lighting is critical for pedestrian safety; discover effective illumination techniques. ↩